

Turn Old Christmas Cards into Ring Gift Box Part 2
Have you ever wondered what to do with all those old Christmas cards after the silly season?
Well, today I am going to share with you what we like to do if we can't recycle our cards locally...See below for all the details...but we also have a great YouTube Video for you to check out too...To help with some of those tricky parts.
Supplies that you are going to need
Old Christmas Cards (Square Cards)
6.5" Quilting Ruler or larger
School Ruler (30cm or 12" in Length)
18mm Rotary Cutter
Pencil
Eraser
grab all your supplies and
Let's get Started
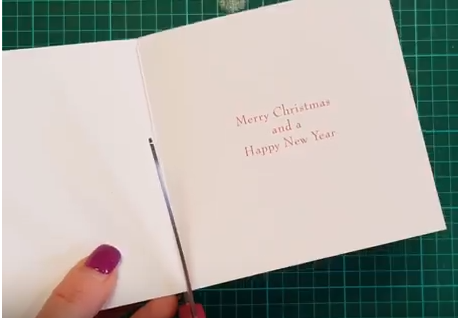
Step 1. Take your card and cut in half.
Then take the top front of your card and mark a
X in the middle of the card with your lead pencil.

Step 2. Now we get to do some folding.
Next, You take your card and Turn it on point,
and take the corner of your card and bring it up to the centre of the cross,
that you just marked on the card.
Now that you have made the crease unfold that,
and take your corner and fold just a little into that crease.
Then fold it on itself, and then again till it lines up to the centre line.
Repeat on all 4 sides.
As you may not understand exactly what I am trying to say,
I have included a step by step instruction video
for you to work along with.


Step 3. Once you have made all your creases
Erase out your marked cross. As you can see from all the creases, it
has made what looks like a little box in the centre.
Now take your pencil and mark the corners of that box/Sq
Step 4. Now get your scissors, turn your card on point again and cut to the first
dot on the right and the repeat on the lefthand side. Turn your
card to the opposite of where you just cut and repeat.

Step 5. Next, we are going to assemble the ring box as you can see from the pictures below, you need to take the sides that you haven't cut, and we are going to fold them in again. This is going to make the sides of your box. You may need a little glue to hold this in place. Once you have done that. Spin your card and repeat. You can use our Video here.


Step 6. Next, we fold our sides in to secure our ring box. Place a little dab of glue or double-sided tape to secure, permanently in place
. And that is it you have finished your ring box lid.


Step 7. Now that we have made our top of the gift box, we move
onto forming the bottom of our gift box.
Take the other half of your card that you set aside.
We are going to do the same thing as we did the top but first,
we need to trim some of the cards from two sides of the card, we only have to remove a quarter inch from each of these sides...


IMPORTANT: If you haven't seen the Step by Step instructional video now is the time to view it as you will be able to see the following in more detail...
Only remove a quarter inch from two sides of your card...if you remove any more than this then your gift box bottom will be too loose. If you are still not sure, then watch this video to show exactly what we have done.
Step 8. Repeat steps one to step six. making sure that all your sides
are secure and glued into place.

Tada, you have now made your own little gift box to use for anything
you like...I have used them for all sorts of things
in the past from wonder clip holders to making Little Sewing Kits as gifts for my sewing friends and even Jewellery for my girls...

I hope you like what we have shared with you today.
We always love seeing what you are making,
so why not head over to our Facebook group and Join in the fun
of sharing what your gift boxes with the community.
If you haven't already Subscribed to our YouTube Channel, then
Head on over and hit that Subscribe button and the little bell
beside it so you don't miss out on any future posts.
Until Next Time
Happy Quilting & Crafting ") N

What a great idea!!! Super creative!
ReplyDeleteThank you, would love to see some of your creations <3
DeleteI'll be sure to try this soon! 😊❤
ReplyDeleteThese are great to make with the kids, My kids like making them for their friends <3 can't wait to see what you make :)
DeleteWow...this is super creative!.
ReplyDeleteWould love to try it out some day! 😊
Thank you so much for your kind words...Oh I really do hope you give this a go, they are super easy to make,
DeleteThis comment has been removed by the author.
ReplyDeleteGreat idea!! Thank you for sharing
ReplyDeleteThank you for stopping by :) :)
Delete